

How To Add Text On Adobe Photoshop
There are various ways you tin can add text in Photoshop while adjusting the position, color, and other creative aspects. With the aid of the Type Tool, writing text over an image tin be washed in seconds. Here's 1 of the easiest ways to add text in Photoshop.
To add text in Photoshop, select the Horizontal Type Tool (T) from the toolbar. Click on your canvas to create a new Text Layer, then begin typing your desired text. Once consummate, press the ESC cardinal or the checkmark in the upper bar to commit to your changes.
Assuming you desire to spice up your text a little more, there's a ton of ways y'all tin practice that. Whether you desire a single word, a paragraph, vertical text, or creative effects like curved or outlined text, y'all'll larn how to do it all of that in this post!
How To Add Text In Photoshop
Step one: Select The Horizontal Blazon Tool
To begin, select the Horizontal Type Tool establish in the toolbar in Photoshop. Simply wait for the T icon if you aren't sure!
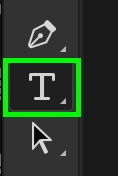
If you like keyboard shortcuts instead, just press T to access this same tool.
Step 2: Click On Your Canvas
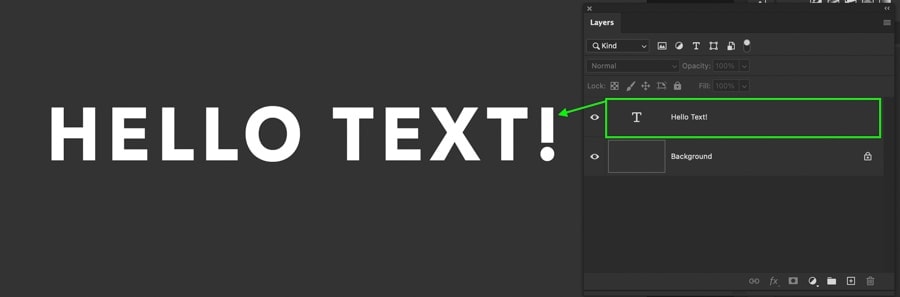
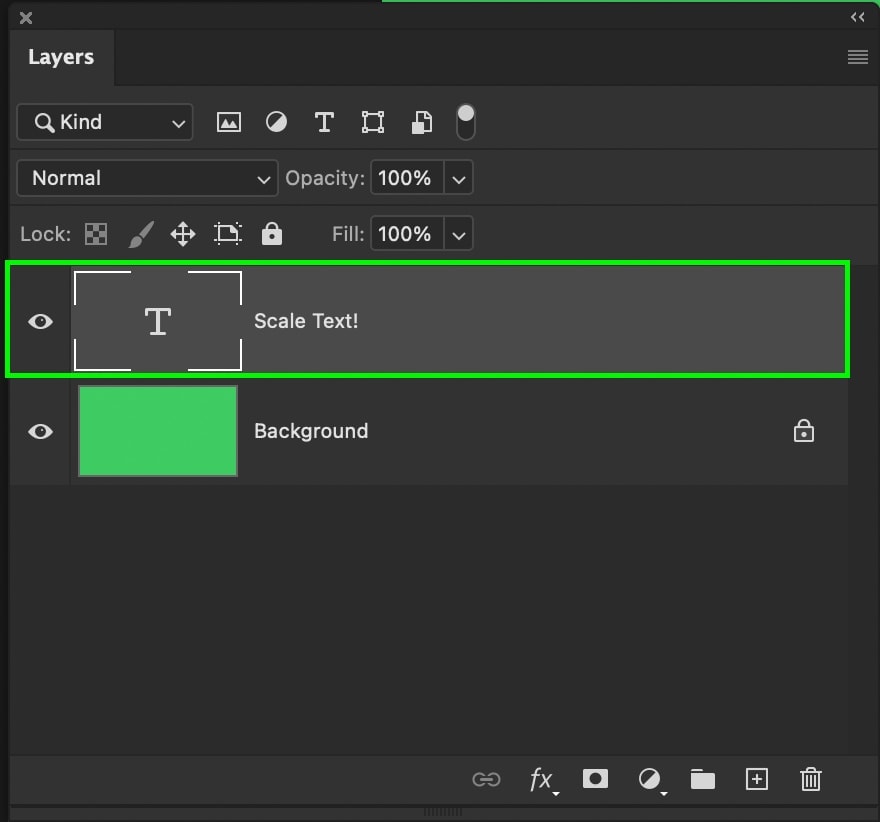
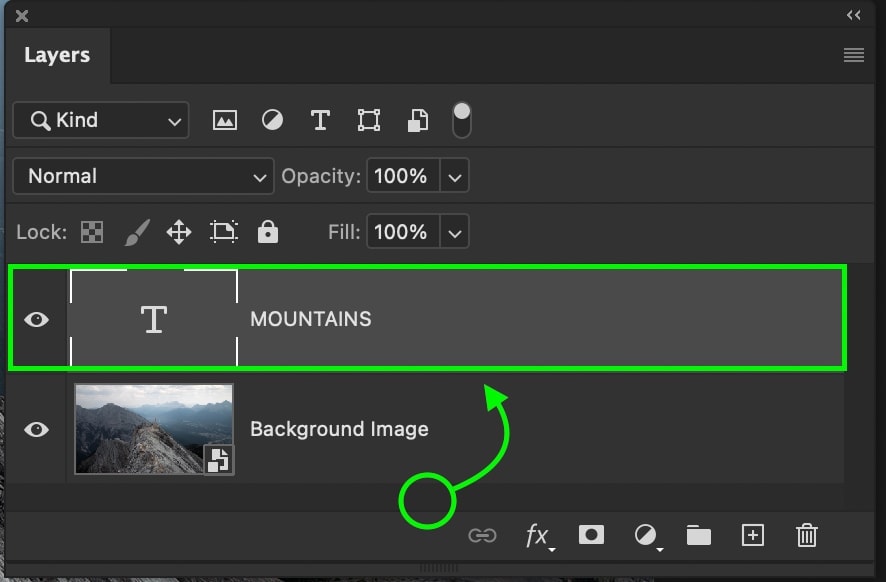
With the Horizontal Blazon Tool selected, click on your canvass to create a new slice of text. This will automatically create a new text layer in the layers panel.

Text layers are what you'll use afterwards on to keep track of your different pieces of text and for editing.
In some cases, you may have words such every bit "Lorem Ipsum" appear when creating new text layers. This is known as placeholder text in Photoshop and information technology can be turned off if you don't similar information technology.
More on that later.
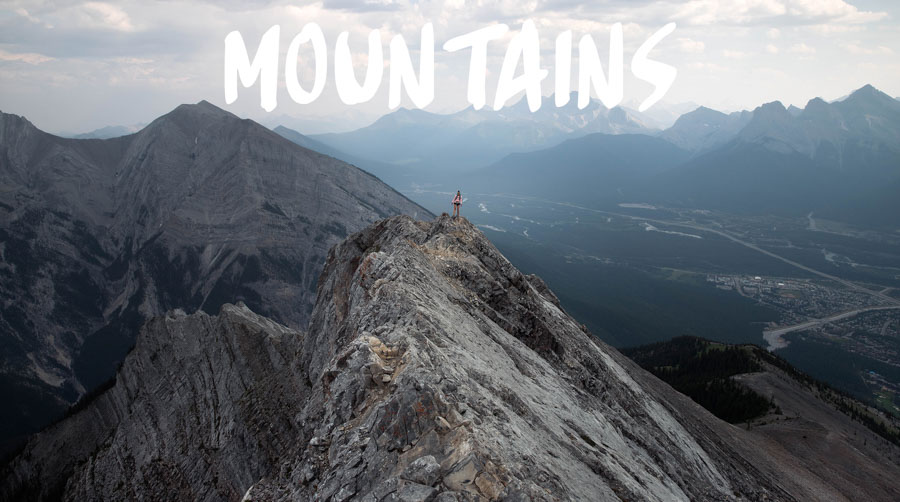
Step three: Type Your Text
After clicking on your canvas, begin typing the text you lot desire to add to your image. With the horizontal type tool, your text will go on in a horizontal line forever. This is slap-up news since you can never run out of room, but it tin can be challenging to fit in your image.

Luckily you tin can press the Enter key to create a new line with your text. Just like a word certificate, yous can quickly format your text manually with this technique.
If you have a paragraph of text you want to add, there is an even easier choice. I share all the details in the "Betoken Vs. Paragraph Text" section of this postal service below.
Step four: Press The ESC Key To Save Changes
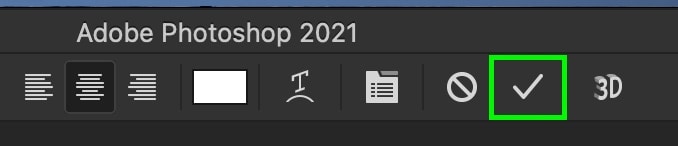
Once you're happy with the look of your text, press the ESC key to commit to your changes.
Alternatively, you can press the checkmark in the upper settings bar for the same result.
With either of these methods, y'all'll stop editing the text and be able to view information technology every bit a regular layer. No editing box or insertion point (blinking line) to look at anymore!
Now that you know how to actually add together text to your images let's talk about editing the look of that text.
How To Edit Text In Photoshop
To edit text in Photoshop, select the Blazon Tool, then click your text. Press Command/Control + A to highlight your text, then go to the upper settings bar. Here yous'll find options to change the font, color, size, and alignment of your text in Photoshop. Once consummate, press the ESC to save changes.
At present let's get a little more specific and dive into the details of customizing the bones expect of your text.
– Irresolute Type
If you have a spelling mistake or just want to change upward what you lot've written, whatever text layer can be hands edited in Photoshop. The fastest style is to just double-click on the text in your canvas. This will automatically make the text editable and let you to add or delete text from your layer.


For those who are using an older version of Photoshop, this feature may not work. Instead, select the Type Tool by pressing T or selecting it from the toolbar. And so click on the text you lot want to edit in your canvas or click on the text layer in the layers panel.

Just like a regular word document, you tin can click in different areas of the text to motion the insertion betoken. You lot can besides delete whatsoever of your text by pressing the delete key on your keyboard to go letter by letter. Like shooting fish in a barrel peasy!

– Changing Text Color
To spice up your text and change the color, there are two ways you tin can go nearly this. This showtime way is past double-clicking on your text to edit it, just equally you would for changing the type.
In older versions of Photoshop, press T to select the Blazon Tool and click on the text you wish to edit.
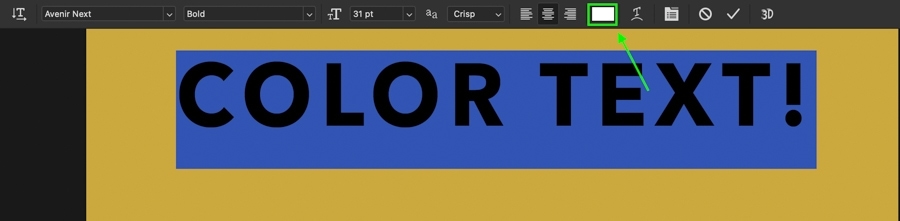
Now press Control + A (Mac) or Control + A (PC) to highlight all of your text. If you lot just want to change the colour of a single word, click and drag your mouse over the text to highlight a specific area.

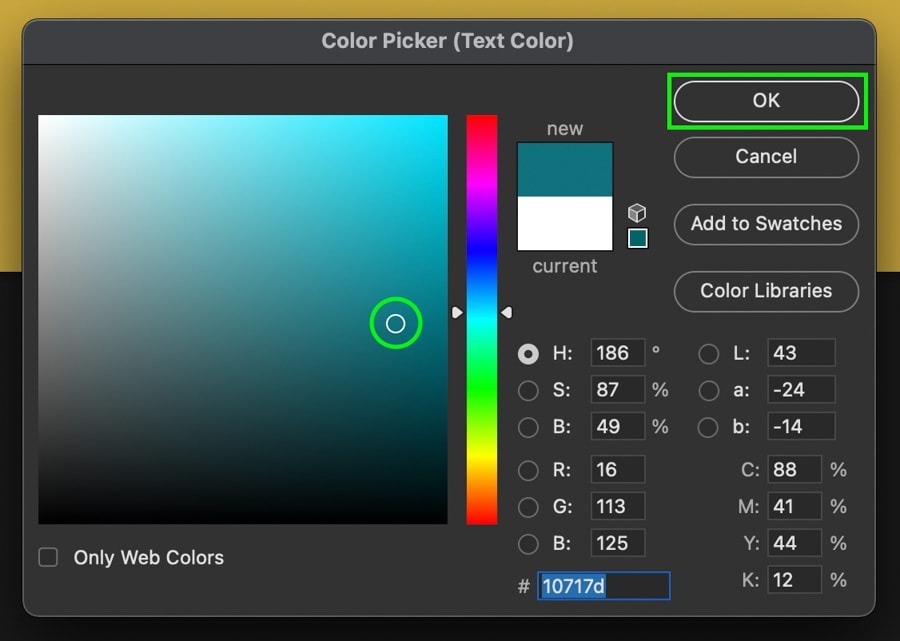
With the text highlighted, go to the upper settings bar and click on the color fill option. A color picker volition announced where y'all can choose whatever color you fancy for the text. In one case happy, click OK, and your new color will be applied to the text.

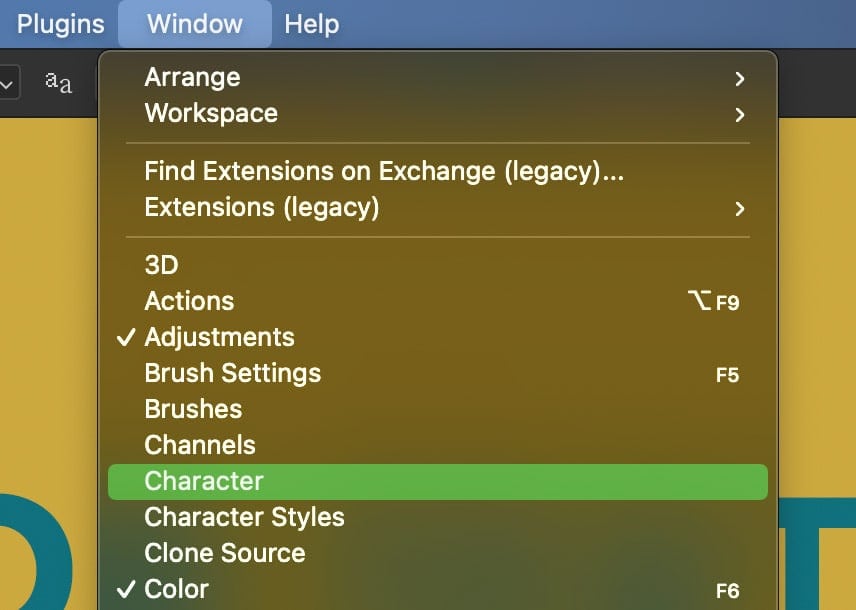
Every bit an alternate method, you lot can too use the Character Panel to change text color in Photoshop. If you don't see the Graphic symbol Panel go up to Window > Character to open up this console.
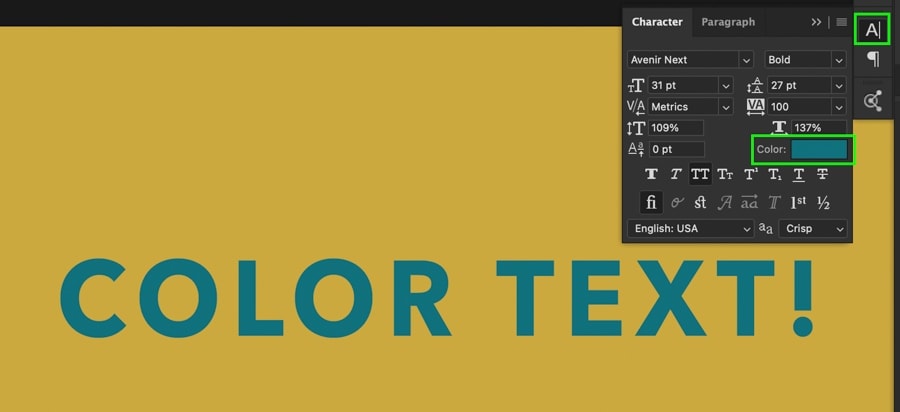
Making sure your desired text layer is selected in the layers panel, click on the Color option inside the Character Panel.
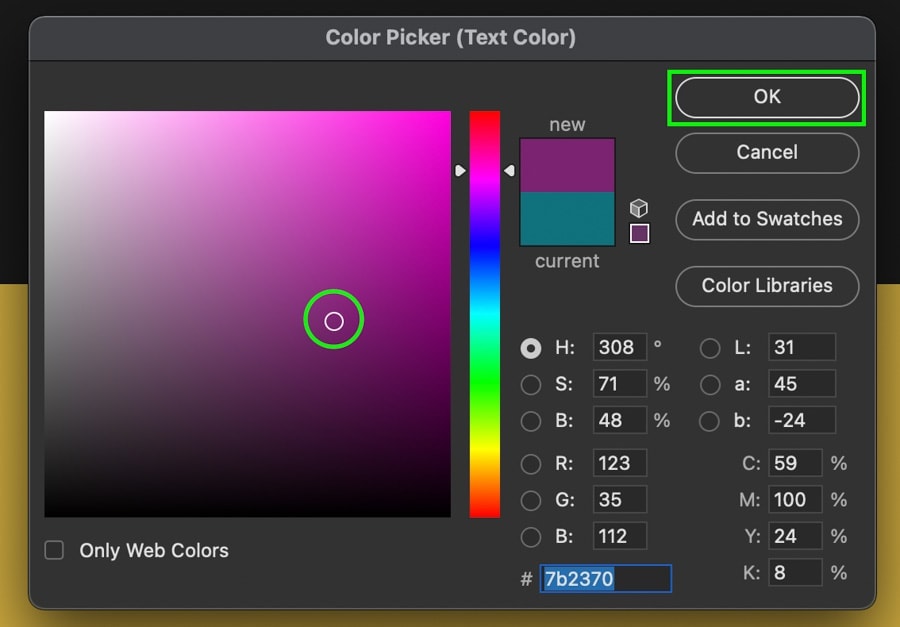
Simply similar earlier, a color picker will appear, allowing you to choose a new color for your text. With a new color chosen, click OK to utilise the updated color.
The Character Panel method is good for changing the entirety of your text's color in fewer clicks than the previous method.

– Adjusting Font Size
You can hands adjust the font size directly or only calibration your text with the Move Tool. Let's beginning discuss irresolute the font size straight.
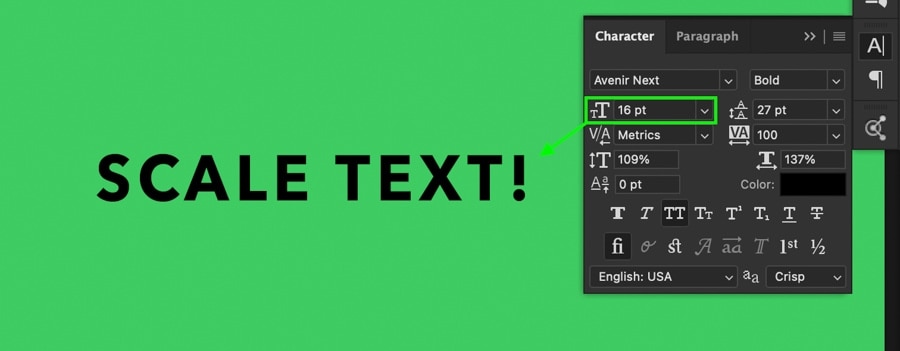
Showtime, select your desired text layer and open the Graphic symbol Console. If you don't see this console, go to Window > Graphic symbol.
Click on the dropdown menu for the font size setting and choose a new size.
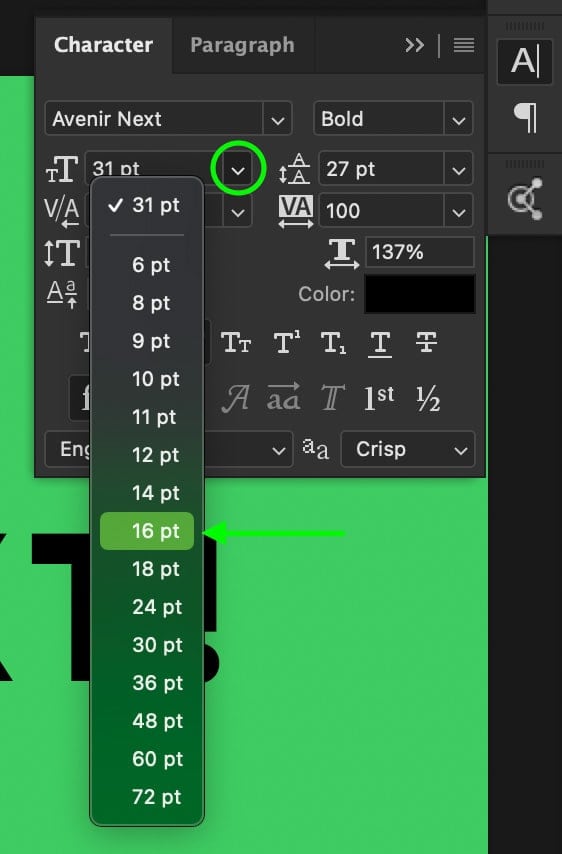
Alternatively, you tin click on the font size number and blazon in a new size yourself. This is ofttimes a improve thought for large font size adjustments.
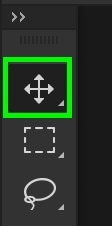
At present, rather than simply using the font size, you tin also scale your text with the Move Tool. Selecting the Move Tool by pressing V, select your text layer, and click on whatever corner of the transform box that appears around your text.
Dragging outwards, your text will increase in size. Meanwhile dragging inwards will brand your text smaller.

The Move Tool offers a more than hands-on approach to changing font size in Photoshop rather than dealing with font size numbers.

– Changing Text Alignment
When you are writing text in a word document, for example, your text is aligned left by default. However, yous can centre the text or align it to the right of your folio depending on the formatting you lot need. In Photoshop, you can practise the same thing with text alignment settings.
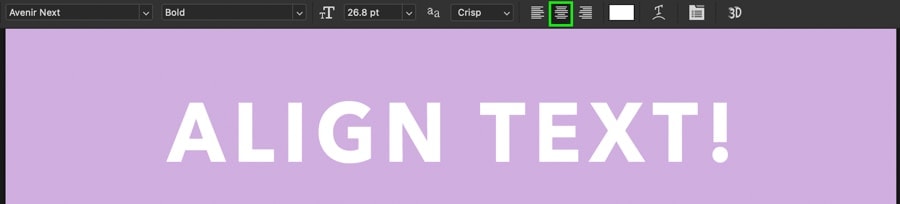
For example, I created a line of text, to begin with. As you tin can encounter, information technology's currently aligned center. By double-clicking on my text to make information technology editable, I can now access my iii alignment options in the upper settings bar.
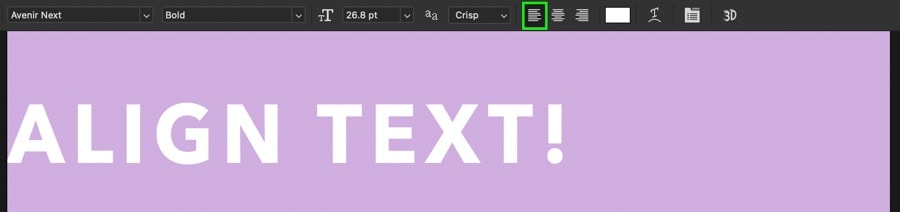
Here'south the result of choosing the left alignment:
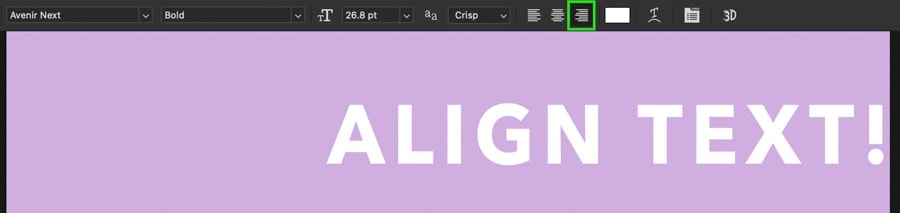
And now the consequence for the correct alignment:
By clicking on whatsoever three of these settings, you can quickly adjust the alignment of text in Photoshop.
– Underlining Text
To underline text in Photoshop, you need to call on the aid of the trusty Character Panel. Once again, if you don't see it, go to Window > Character.
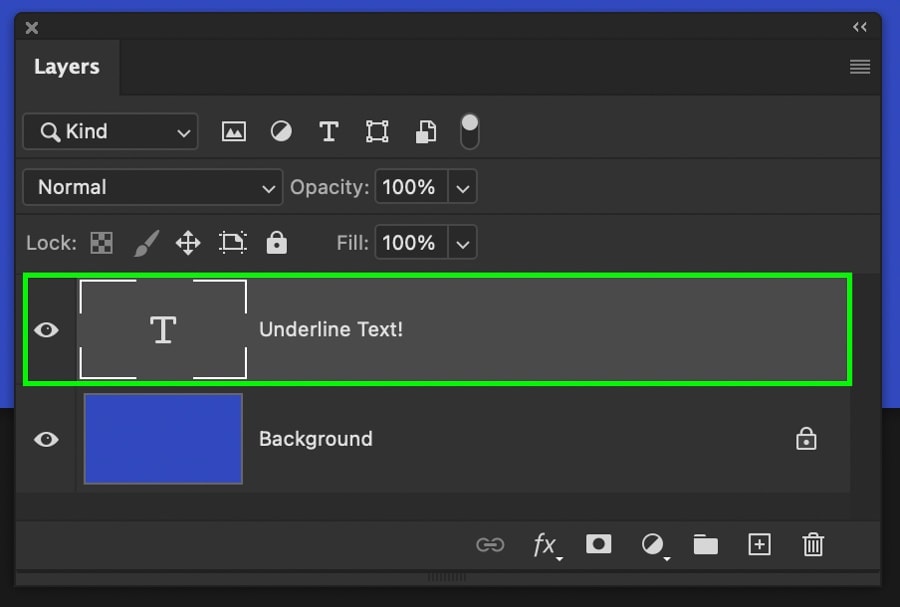
With your desired text layer selected in the layers console, click on the underline pick within of the Grapheme Panel.
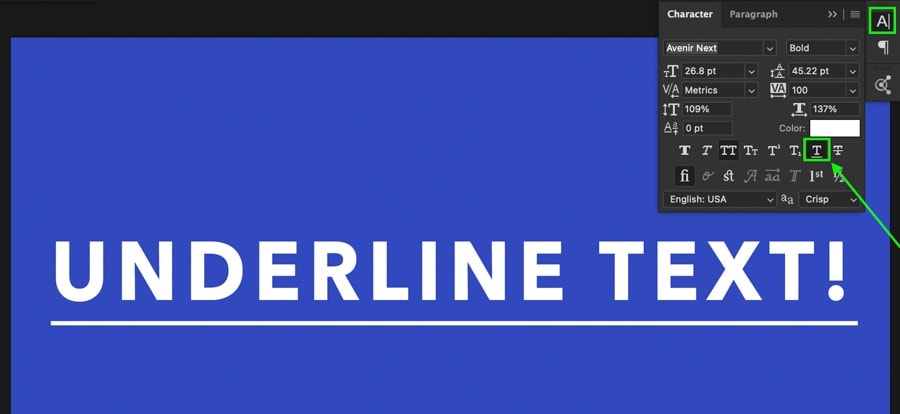
Past clicking this 1 button, you tin quickly underline text on your canvas. To remove the underline, merely click on the underline option again to toggle it.
How To Edit Text Without Creating A New Layer
To edit text without creating a new layer, select the Horizontal Type Tool (T) and double-click on the text you wish to edit. This will make that specific text editable without creating a new text layer. Information technology's important to remember this just works with text that sits on its own text layer.
For case, I have a piece of text in Photoshop and a unmarried text layer in my layers panel representing it.
By selecting the Type Tool (T) and hovering my cursor away from the text, notice how in that location is a box effectually the cursor.

Now when I hover over my text layer, that box disappears effectually my cursor.

This of import distinction lets you know whether you will create text on a new layer or edit the text already in your canvas. A box around your cursor ways you volition create a new text layer when you click.

A cursor with no box indicates you will edit the text yous're hovering over.
Unfortunately, text that is rasterized or was exported with an epitome can no longer be edited. For example, this image has a piece of text that was exported with the image. When I bring information technology back into Photoshop, the text tin can no longer exist edited since information technology's baked into the image.
How To Add Vertical Text In Photoshop
Pace one: Select The Vertical Blazon Tool
To write vertical text, you need to first select the Vertical Type Tool. This tin be constitute by pressing Shift + T to wheel between your text tools. This tool is represented past the T icon with an arrow pointing downwards.
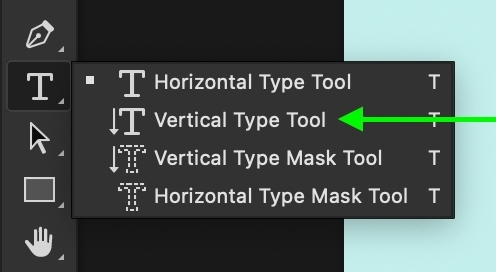
Alternatively, you tin can click and hold on the Blazon Tool icon and select the Vertical Type Tool from the window that appears.
Stride two: Click On Your Canvas
With the Vertical Type Tool selected, click on your sheet to create a new piece of vertical text.

Step 3: Type Your Vertical Text
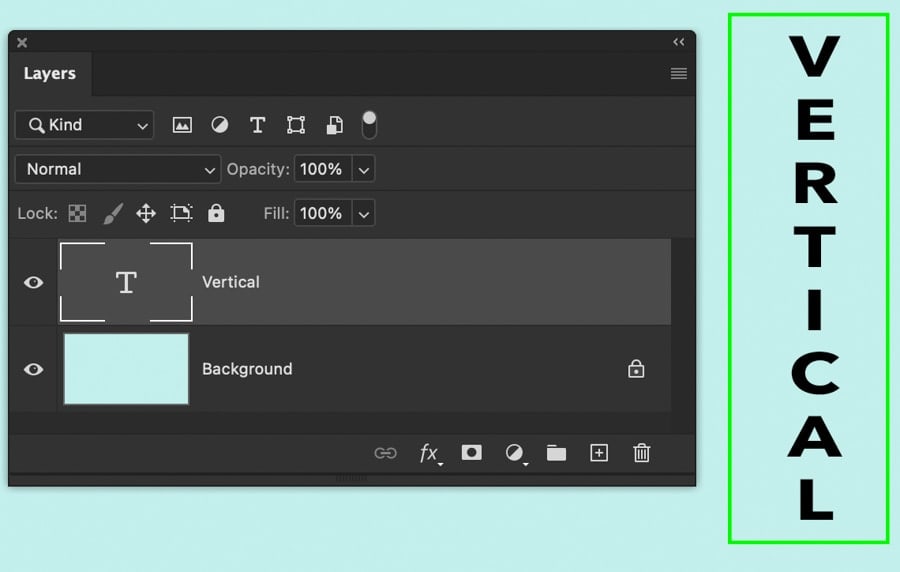
Now yous will accept a new text layer and an active text box on your canvas. Begin typing to add your vertical text on the canvas.

Pace 4: Press The ESC Key To Save Changes
One time you lot're happy with your text, printing the ESC to commit to your changes. Now you lot have successfully written vertical text in Photoshop!
Vertical text can exist edited and customized in the same way as horizontal text. By following whatever of the steps discussed earlier, you can edit this vertical text to better suit your style!
How To Motility And Rotate Text In Photoshop
To movement or rotate text in Photoshop, select the Motion Tool and select the text layer you wish to edit. Hovering outside the corners of the transform box, click to rotate the text in any direction. To movement the text entirely, click the eye of the transform box and drag your text to a new location.
Permit's break this process down more in-depth.
First, select the Movement Tool past pressing V on your keyboard or selecting it from the toolbar.
Now click on the text layer you wish to edit in your layers panel. You will know information technology's selected by the highlight on your specific text layer!
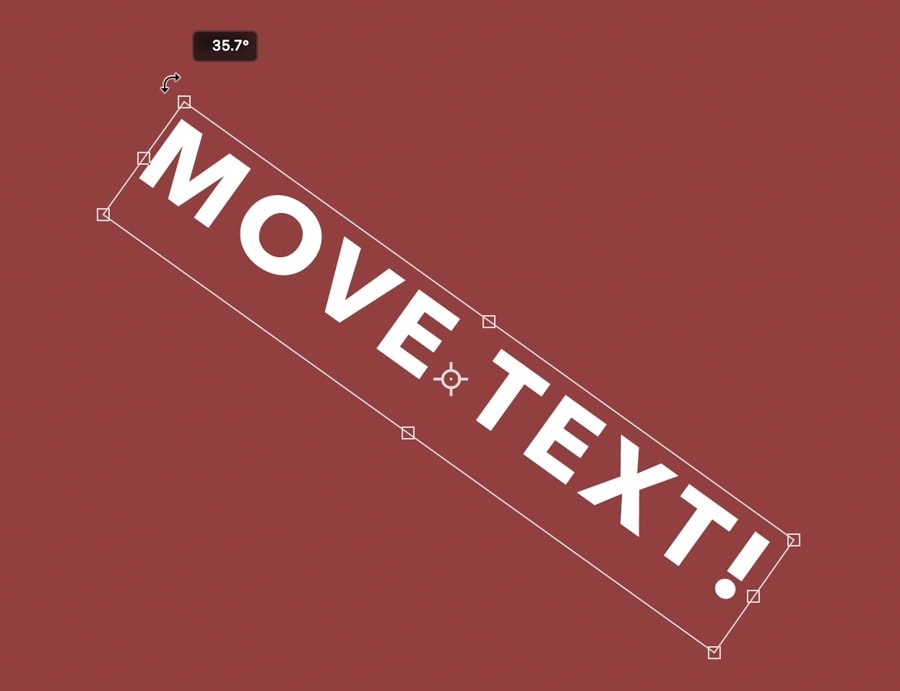
A transform box will appear around your text which allows you to reposition or rotate your layer. To rotate your text, hover just outside of whatsoever corner of the transform box until your cursor becomes a double-sided arrow. Now click and drag to rotate your text!
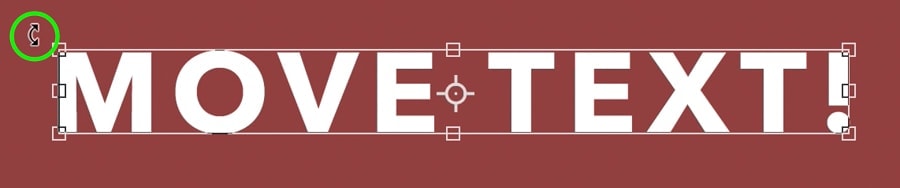
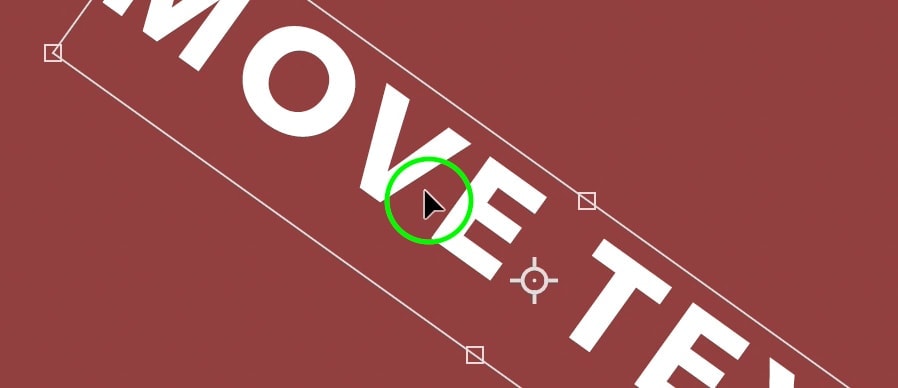
If you want to move your text equally a whole, click in the center of the transform box and elevate to movement your text.
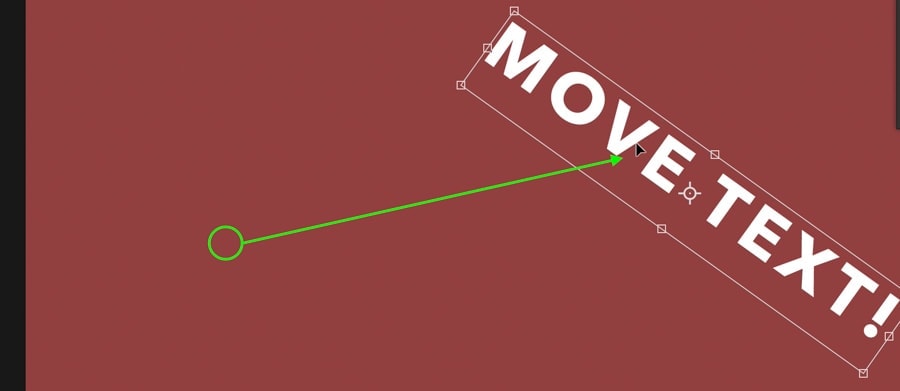
With these ii easy techniques, you can get your text in the perfect position for your image!
How To Put Text Over An Image
To put text over an epitome in Photoshop, first add your epitome to your project and position it. Select the Type Tool by pressing T and click on the canvas to create a new text layer. Blazon your text and printing the ESC key to save changes. Now move the text layer above the image layer in the Layer Console.
The easiest way to add an image to your Photoshop project by dragging and dropping it from your reckoner. I highlight all the means you can add images as layers in Photoshop in this mail.

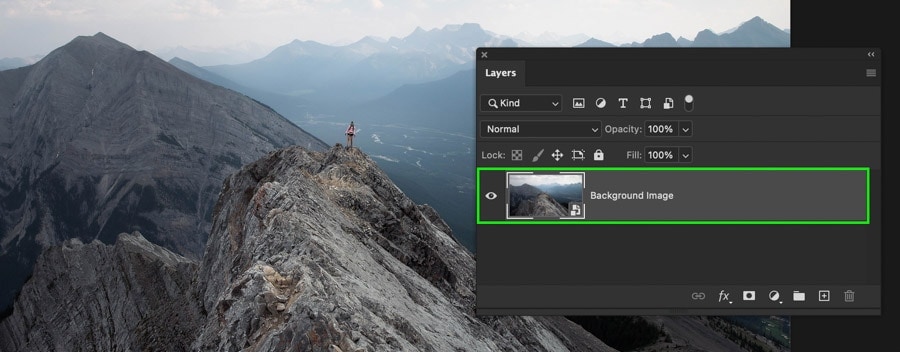
With your epitome in place, select either the horizontal or vertical type tool from the toolbar.
At present click on your canvas to create a new text layer and blazon out the text you want to use.

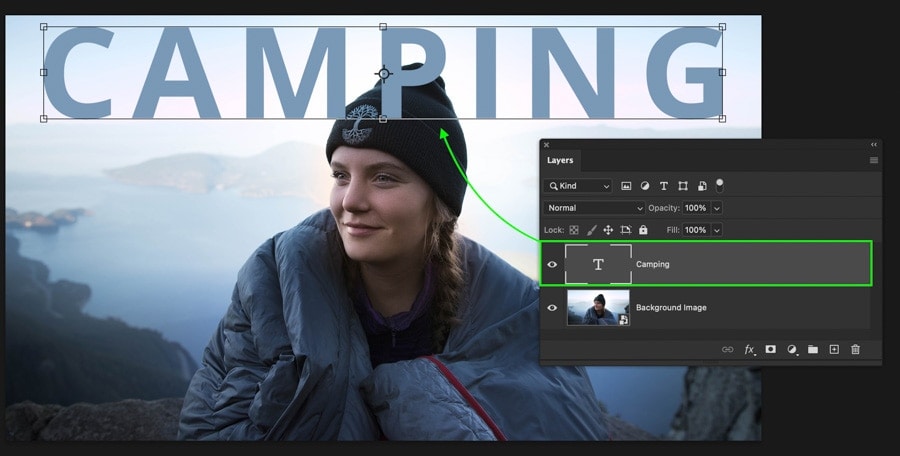
By default, this new text layer should announced in a higher place your prototype, but if information technology doesn't, it's because information technology's hiding behind your image layer. To solve this, click and drag your text layer above the prototype layer in your layers panel.
Now you take successfully placed your text over your prototype! This same process applies to any layer you want to put text in forepart of in Photoshop.
How To Add Text Behind An Paradigm In Photoshop
To place text behind an image in Photoshop, select the Type Tool and create a new piece of text. Using the Quick Choice Tool, click and drag around your subject to select the background. With the option active, click the text layer and add together a layer mask. At present the text is backside your paradigm!
Placing text behind an image gives your photos a cool mag-like feel. Although it seems a scrap complex at outset, it's easily done with the help of a selection and layer mask.
If you're new to creating selections and cut out images in Photoshop, make sure to brush upwardly on your skills hither.
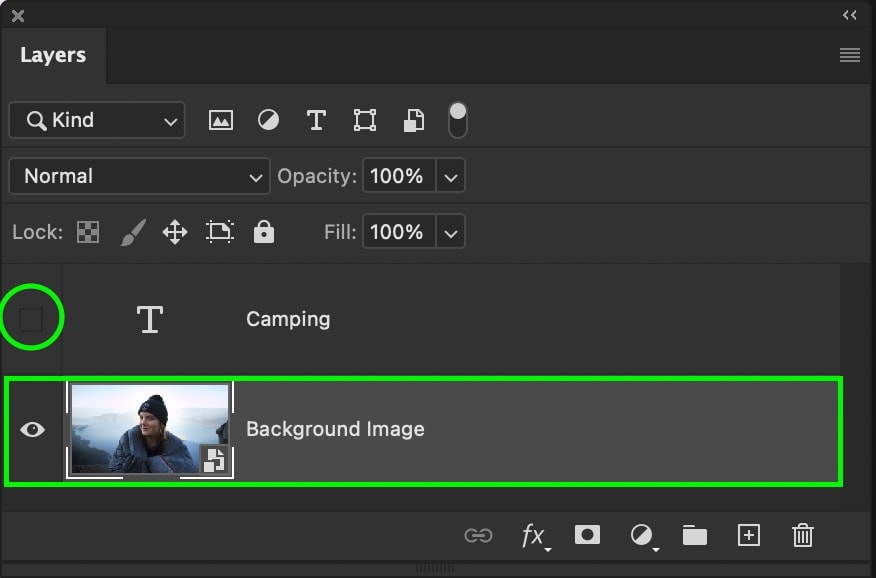
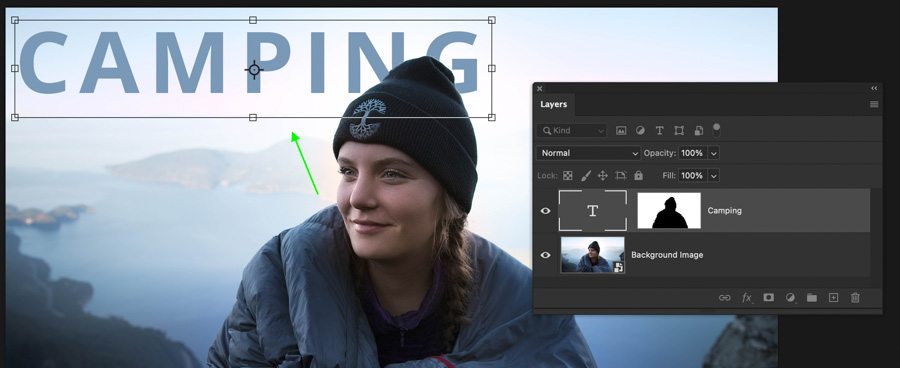
Before you do annihilation, outset by creating your text and position it in your image. Don't worry; you can alter this positioning later on!
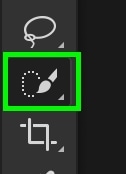
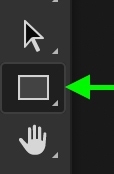
For this case, I'll use the quick selection tool to select the background around my discipline. To access this tool, printing W or find it in your toolbar.
And then turn off your text layers visibility by clicking on the eyeball icon and select your image layer. This is important for getting the all-time selection possible!
To create a new selection, click and drag around the background of your photo. The goal here is to select the places you want the text to be visible. For this instance, I want the text to exist visible in the background but non around the model.
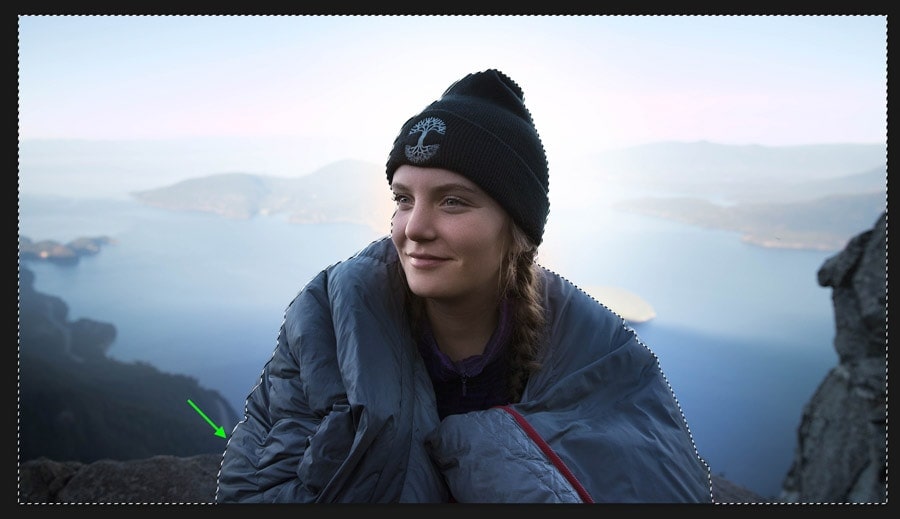
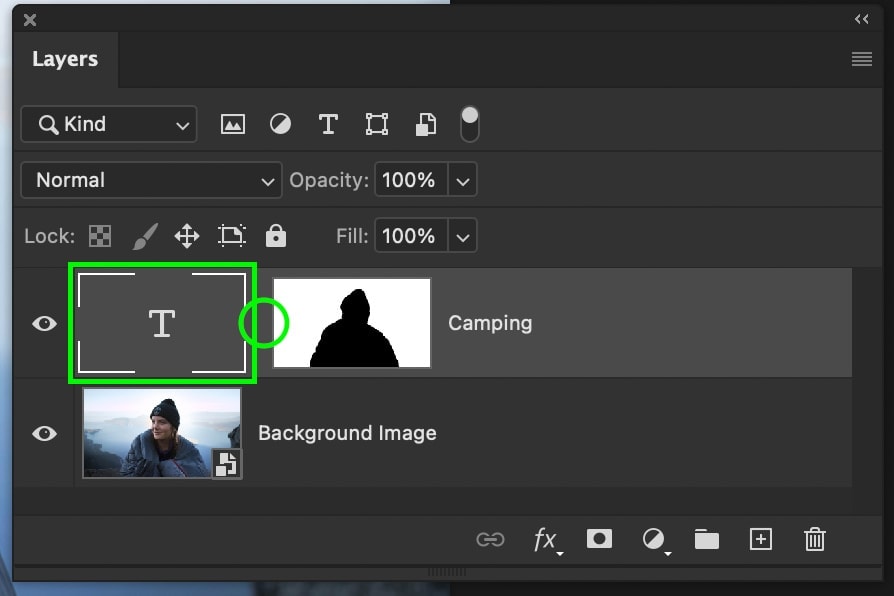
Once your choice is created, y'all'll have marching ants to betoken your selection surface area. Clicking on your text layer in the Layer Panel, click on the layer mask icon to apply the option onto a layer mask.
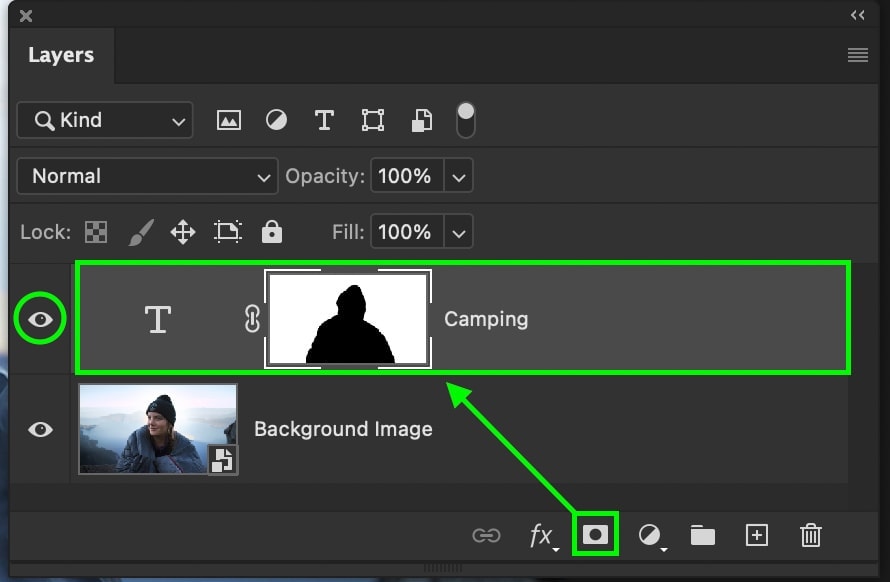
Toggle your text layer visibility and at present your text layer will only exist visible in the selection area you just created, making it appear as if it's behind your bailiwick.
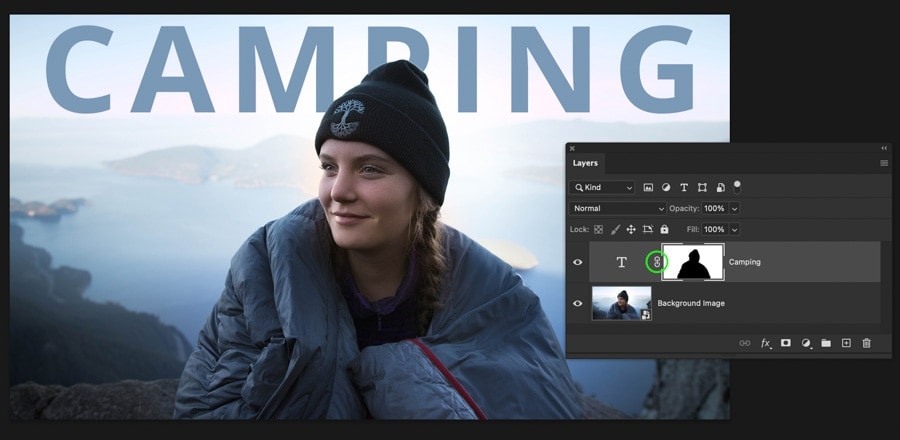
If you want to reposition your text, you'll first need to unlink the text from the layer mask by clicking on the chainlink icon between the two.
Then click on your text layer and select the Move Tool by pressing 5. Now, you tin move your text independently from the mask to ensure it always stays behind your image!

How To Put Text Inside Of A Rectangle
To put text inside a rectangle in Photoshop, select the Rectangle Tool then click and drag out on your sail to brand a new shape. Select the Blazon Tool and click inside of the rectangle to apply the text inside. Now type your text and it will only appear inside of your rectangle!
As I talk about more in-depth in this other tutorial, yous tin put text inside of whatever shape layer simply by clicking on the inside of it. Below I take created a new rectangle shape on my canvas using the Rectangle Tool (U).
You tin can customize the rectangle using the fill and stroke options in the upper setting bar.

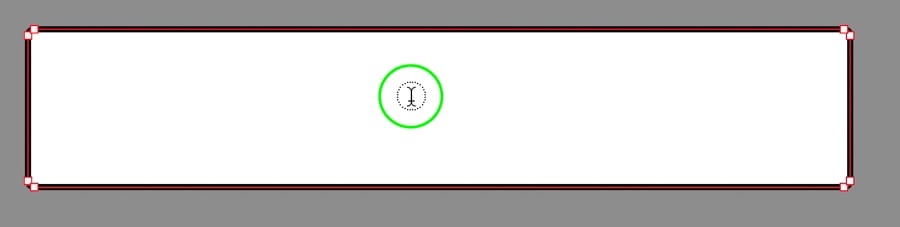
Now I'll select the Horizontal Blazon Tool (T) and click within of the rectangle shape. Discover how the cursor has a circle effectually it when hovering over the rectangle. This means your text will be applied within of your shape.
This method works all-time when wanting longer course text within of a rectangle. The trouble is it's difficult to position the text freely with this method. To brand your text perfectly centered (horizontally and vertically) inside the rectangle, you'll demand to follow a slightly dissimilar procedure.
– How To Center Text Within Of A Rectangle
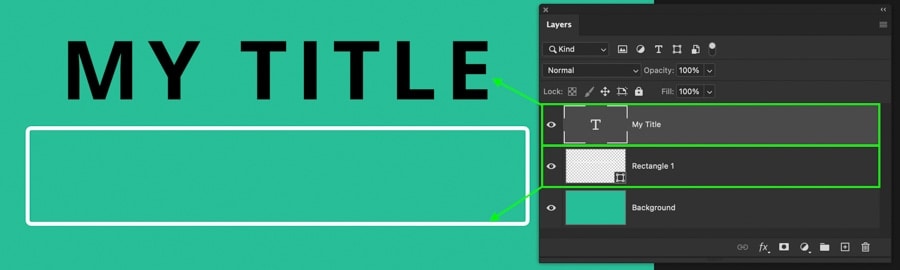
Just as before, create your rectangle shape using the Rectangle Tool.
Now create your text, this time separate from the shape. Rather than clicking inside the shape, click elsewhere on your canvass and then your text tin can be freely positioned.
Type out what yous want to put inside the triangle, and at present you lot volition have a slice of text and a shape totally separate from 1 another.
To heart your text inside of the rectangle now, hold the Control/Command key (Mac/PC) and click on the rectangle layer thumbnail to plow it into a choice.
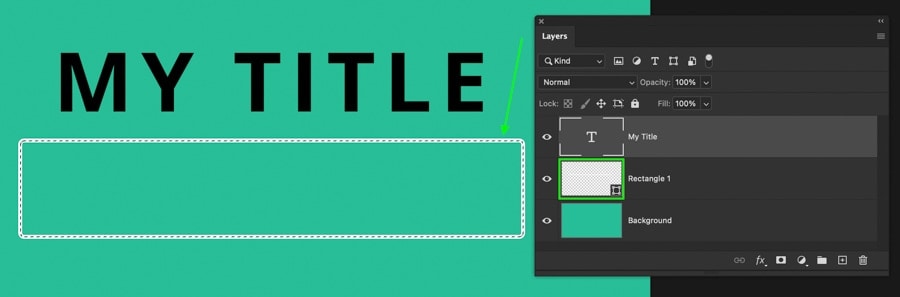
With the new active selection around your shape, click on your text layer and catch the Move Tool by pressing 5.
From the alignment options that appear in the upper settings bar, cull to align vertically and align horizontally.
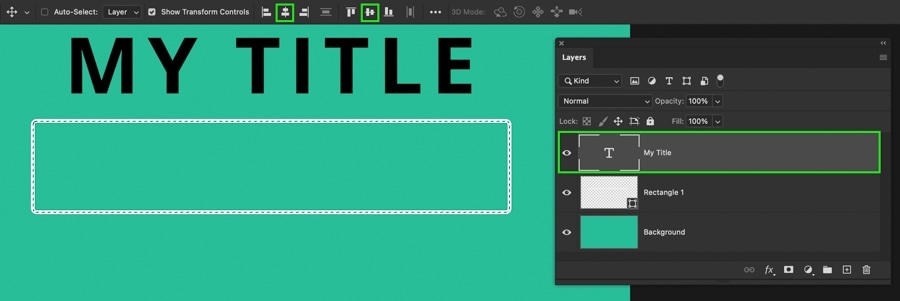
Your text layer will automatically center itself within of your rectangle based on the active pick.
Finally, printing Command + D (Mac) or Control + D (PC) to deselect your agile selection.

At present you have centered your text perfectly within of a rectangle. This is a much amend option for creating titles or centering shorter words inside a shape than the first selection.
Point Text Vs. Paragraph Text
There are ii types of text in Photoshop called point text and paragraph text. Betoken text creates text in a horizontal line for infinity, while paragraph text is confined to a specific text area. Point text is best used for titles in Photoshop, while paragraph text is best for longer bodies of text.

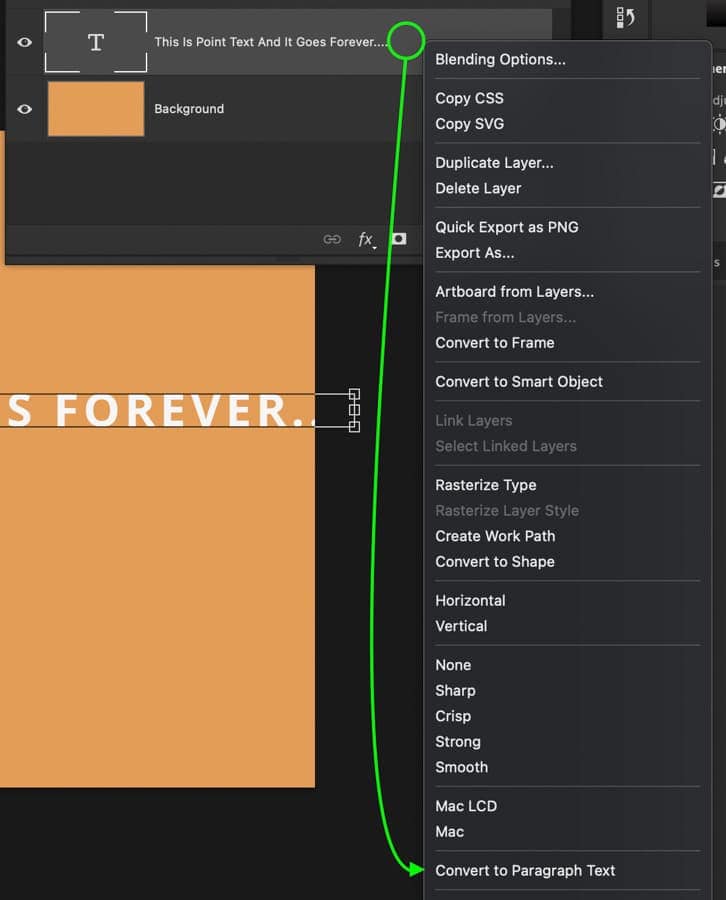
You will create point text past default whenever you create a new slice of text with the Type Tool. However, you can change betoken text to paragraph text by correct-clicking on your text layer and choosing "Convert To Paragraph Text."
You'll notice a box appear around your text which defines the paragraph surface area. By clicking on the anchor points, you lot tin adjust this box to expand or shrink the area your text can be written.
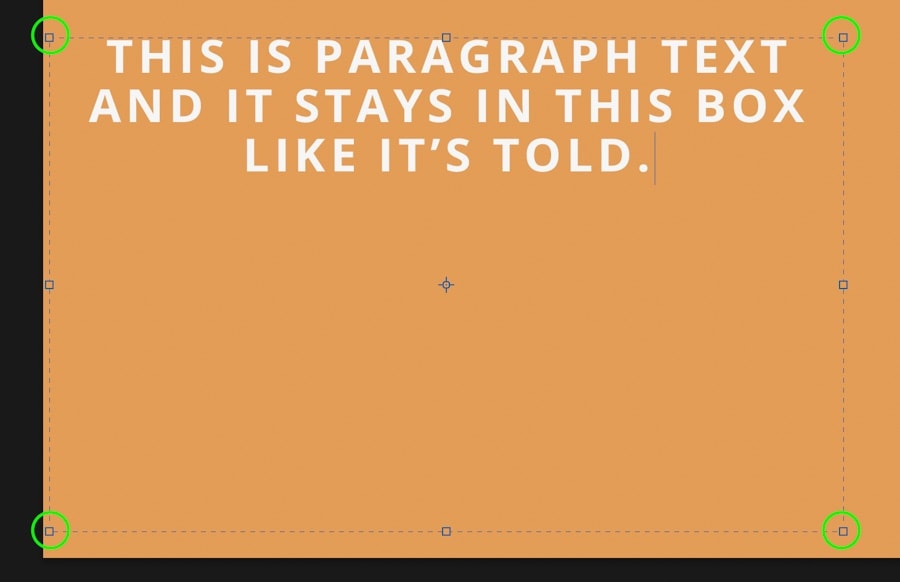
Unlike point text, paragraph text volition only be visible inside of this text box. If the words no longer fit, they volition become invisible outside of the paragraph expanse. Luckily you can quickly adjust the size of it as needed by selecting the text layer and ensuring the Type Tool is agile.
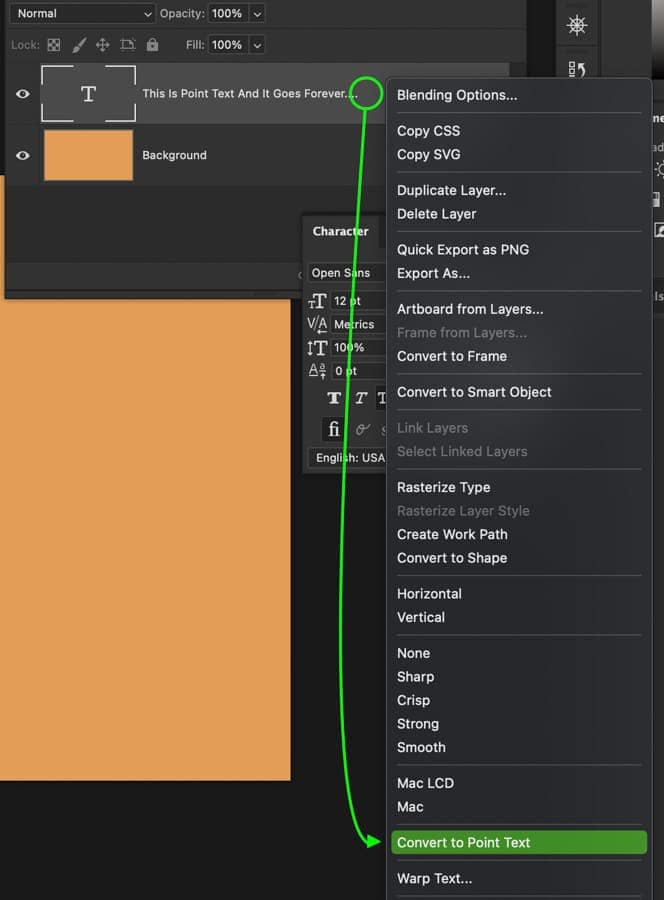
If you ever want to convert paragraph text back to indicate text, just right-click on the text layer and choose "Convert To Signal Text."
How To Outline Text In Photoshop
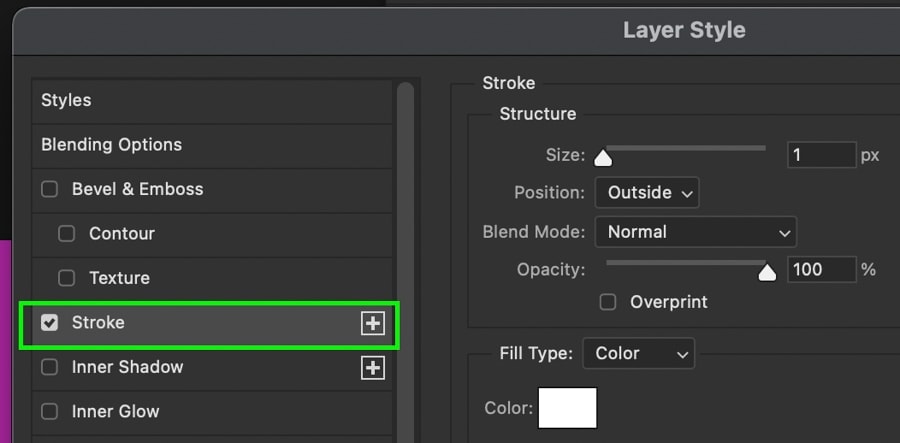
To outline text in Photoshop, double-click on your text layer to open the Layer Styles settings. Select "Stroke" from the Styles options and prepare the stroke position to outside. Gear up the fill-type to "Color" then choose an outline color. Click OK to salvage changes and apply the outline to your text.
Let'due south break that down a niggling more in-depth.
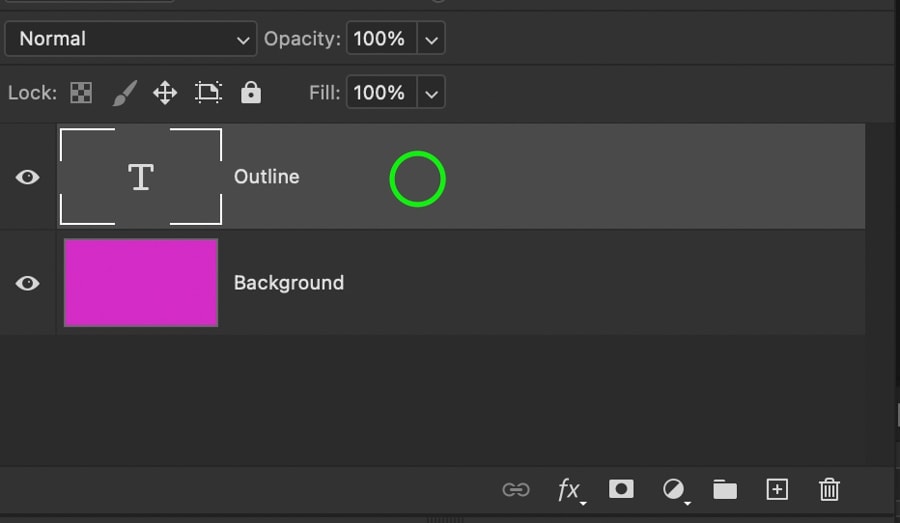
After you've created your text, double click on your text layer to open the Layer Styles panel. This is where y'all can add a diverseness of customized looks to whatsoever layer in Photoshop. Since you want to outline your text, click on the Stroke pick from the Styles bar on the left.
For the best results, set up the stroke position to "Outside," and then make sure your blending fashion is fix to "Normal" and your opacity is at 100%.
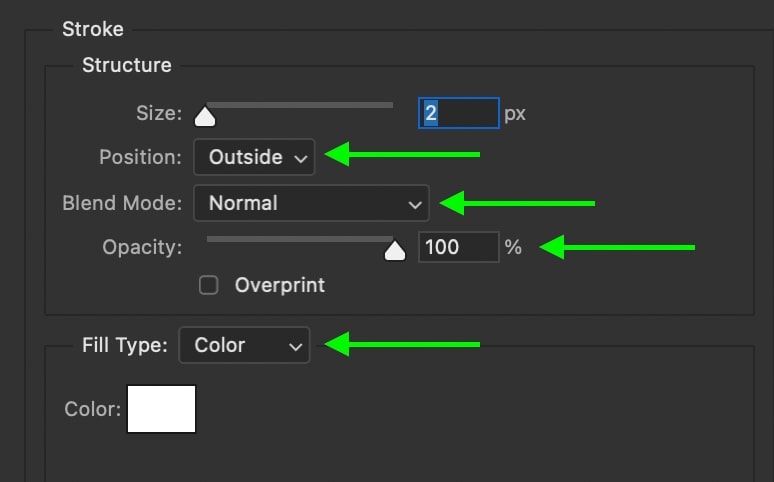
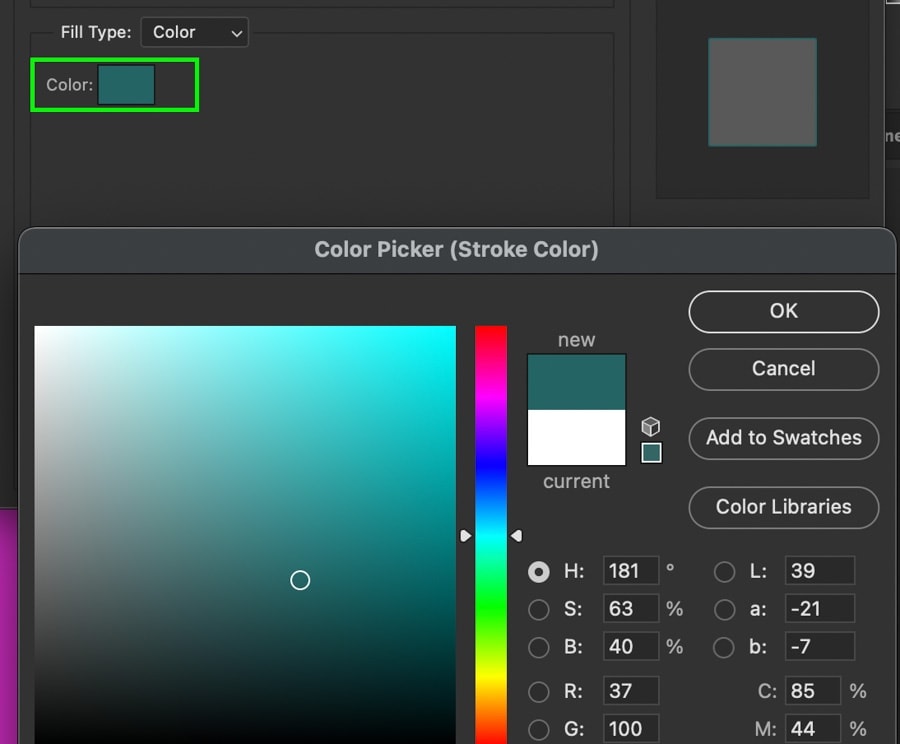
To add a colored outline, set the fill up-type to Color, then click on the colored box to reveal a color picker. Subsequently choosing a new color, click OK to save the new color and apply it to your outline.
With your color chosen, adapt the size slider as needed to make your outline wider or thinner, then click OK to commit to your changes.
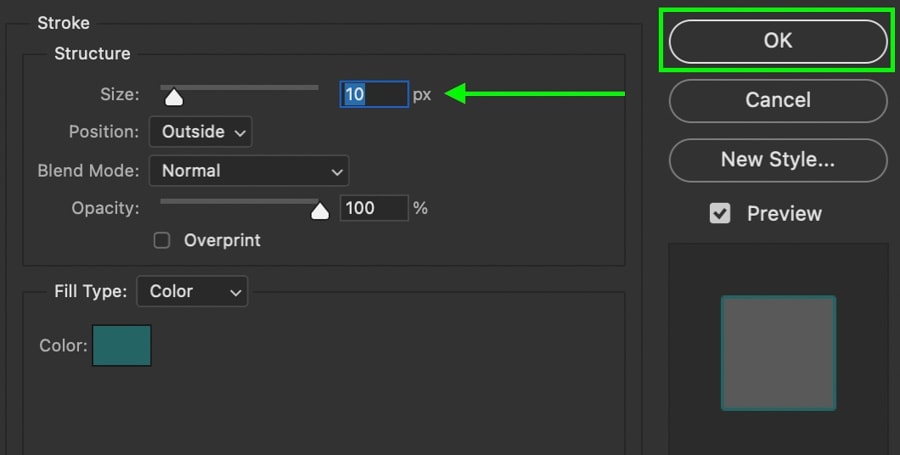
Now you lot take successfully outlined your text!

How To Curve Text In Photoshop
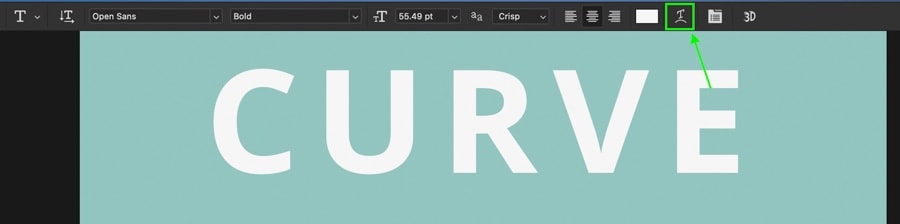
To curve text in Photoshop, select your text layer and access the Blazon Tool by pressing T. Click on the Warp Text option in the upper bar and set up the style to Arc. To adjust the corporeality of curve in your text, adjust the bend slider as needed to refine the curve.
The Warp Text option can only be constitute in the upper setting bar when the Blazon Tool is active. This icon for this tool is a T on top of a one-half-circle.
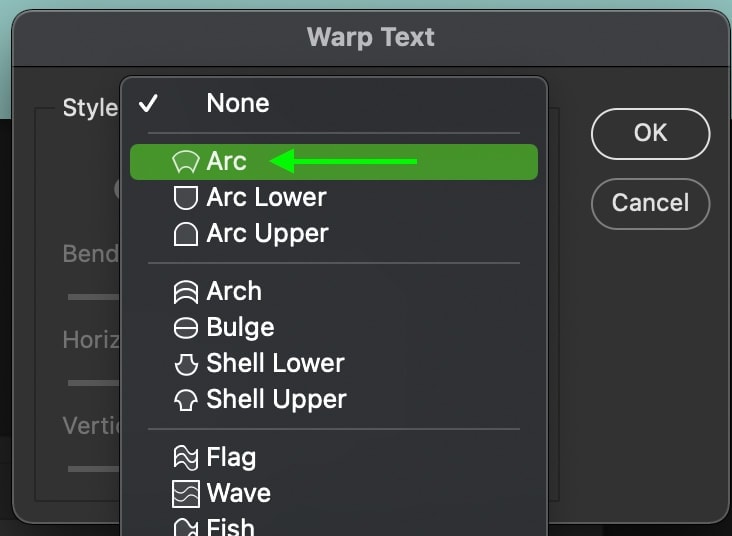
Inside the warp text options, you tin can choose from a variety of warping styles. For a full general curve, the Arc option will work best.
After applying your style, the text will be automatically warped to fit that specific shape. With the aid of the curve slider, you tin make the curve more than or less pronounced.
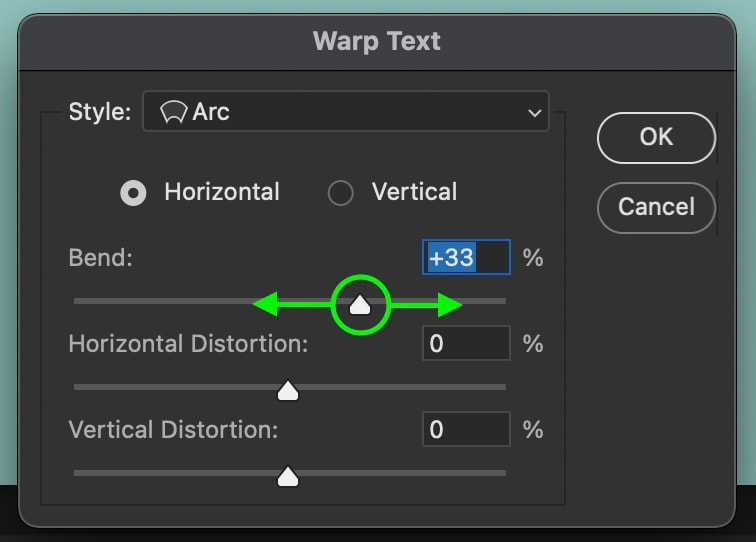
In one case you're happy with the adjustments, click OK.

For curving text lone a specific line, such equally the shape of a wave, you'll need to follow some slightly different steps, which are outlined in this post.
How To Edit Placeholder Text Settings
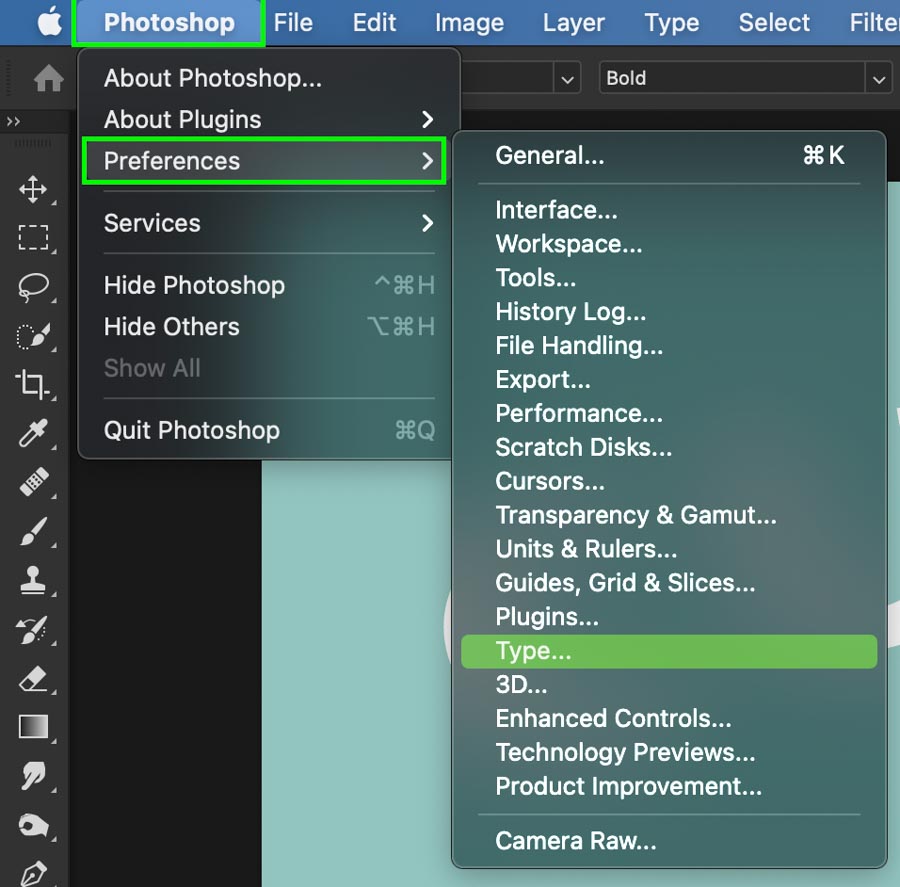
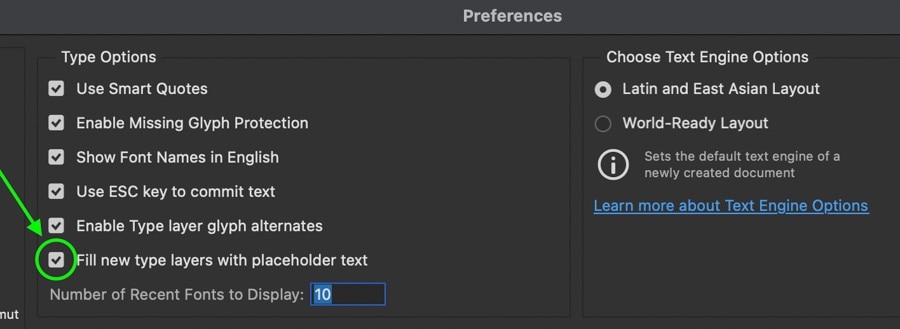
To edit placeholder text settings in Photoshop, also known every bit Lorem Ipsum, go to Photoshop > Preferences > Blazon. To plow off placeholder text, uncheck the option for "fill new type layers with placeholder text." Now you will no longer have placeholder text when creating new text in Photoshop.
Placeholder text tin can be helpful to give you an idea of the wait and size of your text before you write anything. However, the flip side is that it gets in the way at times and can become a little annoying.
By accessing your preferences via Photoshop > Preferences > Type, y'all can toggle placeholder text on or off with the "fill new type layers with placeholder text" option.
Whether yous choose to use placeholder text or non totally comes down to personal preference. There's no other reward to it besides offering an immediate preview of your active text settings.
How To Add together New Fonts To Photoshop
To farther customize your text in Photoshop, fonts are an easy tool for the job. In many cases, yous'll feel underwhelmed past the default text options constitute in the programme. Luckily you can quickly add new fonts to Photoshop without paying a single cent!
First, find a font you'd like to utilise via any of the free font providers online. A few great options to expect at are Dafont, 1001 Free Fonts, or Font Space.
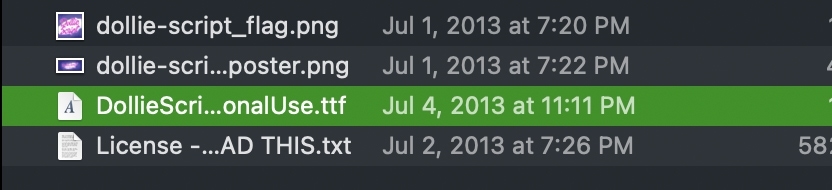
Later on downloading your new font to your figurer, open the .Cypher file, access the folder, then double click on the .TTF file.
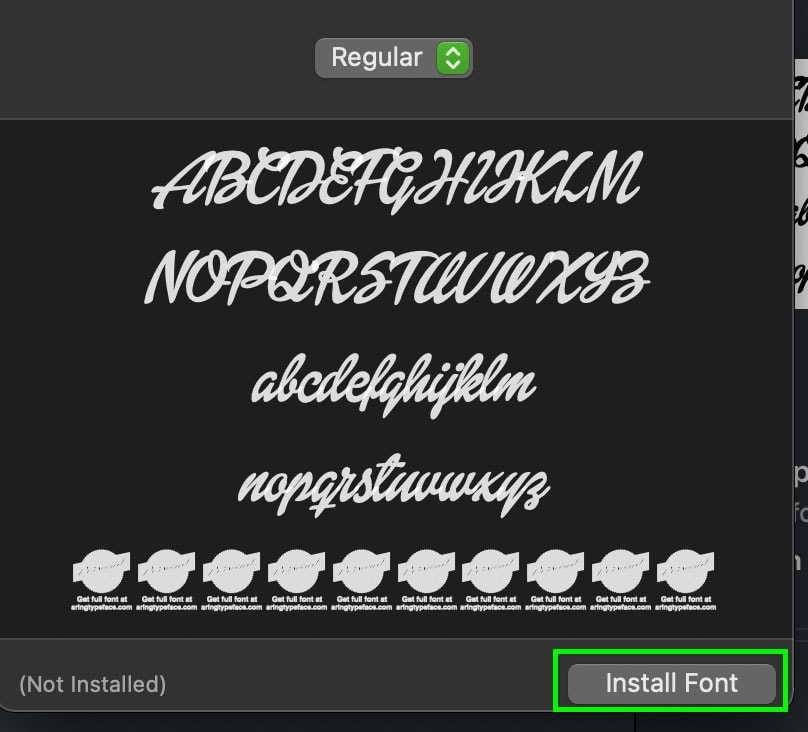
And so click Install Font to add it to your calculator'due south library of fonts.
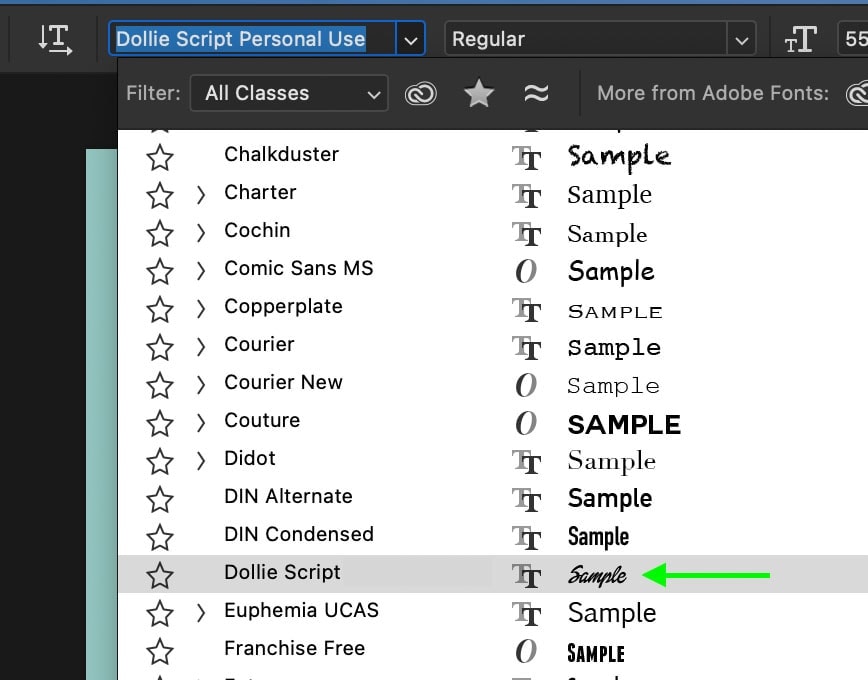
In one case the font is added to your estimator, information technology volition automatically announced within Photoshop. With your text selected, click on the font type and select your newly installed font to employ it to your text!
Now you know the ins and outs of adding text in Photoshop. Whether you want to create titles, long paragraphs, or practice your graphic design, it'due south all possible with the tips outlined in this mail.
Now, if you're ready to learn some advanced text effects in Photoshop, check out the posts below!
- How To Wrap Text Effectually People
- How To Fill Text With An Prototype In Photoshop
- Creating Gradient Text In Photoshop
- How To Add Drib Shadows To Text
Happy Editing!
Brendan 🙂
Source: https://www.bwillcreative.com/how-to-add-text-in-photoshop/
Posted by: gwinnonen1947.blogspot.com
0 Response to "How To Add Text On Adobe Photoshop"
Post a Comment